· 1 min read
Building portfolio: Install Next.js and Tailwind with pnpm
Hello Friends 👋,
As I learn and build my portfolio website with Next.js and Tailwind in public, I will write the process and progress.
This time, I will write them down in a different format than my other blog posts. This series will be personal notes of what I did and the blockers, if any, instead of thorough explanations of the steps and concepts. I will also share the next plan. Expect many bullet points and super short posts in this series 😁!
Installation
I installed Next.js with pnpm. But you can install it with npx or yarn. Check out the installation section on Next.js documentation for more information.
-
Run this command to create the project with
pnpm:pnpm create next-app project-name -
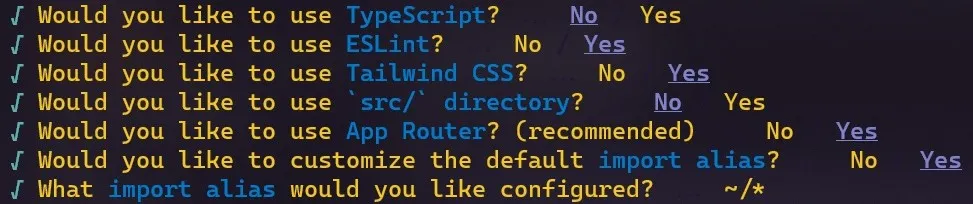
Fill out the prompts.
-
For now, I don’t use TypeScript for this project.
-
It’s great that there’s an option to include Tailwind, so I don’t have to install it separately and configure it myself 😁.
-
I ticked yes for all the yes/no prompts except for creating the
src/directory. I will add it myself later if necessary. -
My import alias configuration is
~/*. Some people use~, and some use@. It’s all about personal preference.
-
Next plan
- Add pages to the website—About Me, Blog, and Contact Me. These pages don’t have to have content for now. But they should have a link to go back to the Homepage.
Starter kits
My friends suggested these starter kits if you want to save time on installation and configuration.
-
Next.js, React Query, and Tailwind starter kit — thank you, Jessica Wilkins!
-
T3 — Full-stack, typesafe Next.js app — thank you, Joe Karow!
Resources
-
How to install nextjs with pnpm by Rajdeep Singh