# Planning And Tracking Projects With GitHub's Projects Tool
Hello Fellow Codenewbies 👋,
A while ago, I wrote an article called [How To Use GitHub For Project Collaboration — Based on Agile Method](https://adiati.com/how-to-use-github-for-project-collaboration-based-on-agile-method).
Since then, GitHub has had new updates for the projects board. So I'm writing this article as an update of the section "[Create project board](https://adiati.com/how-to-use-github-for-project-collaboration-based-on-agile-method#heading-4-create-project-boards)" within my previous article.
## What is Projects?
> Projects is an adaptable, flexible tool for planning and tracking work on GitHub.
— [GitHub docs](https://docs.github.com/en/issues/planning-and-tracking-with-projects/learning-about-projects/about-projects)
The Projects has the same purpose as a [Kanban](https://www.atlassian.com/agile/kanban) board. If you have never heard about it, Kanban is a common and widely used framework in an Agile environment to see the state of the project's work.
Even when we're working on a solo project, we can still take advantage of the project board on GitHub to keep us on track with planning and executing our project.
This projects board is integrated with our issues and pull requests. So, we can easily convert our plan on the board into an issue, and track the progress of our issues and pull requests.
This article will cover the most basic use of the Projects tool, which is suitable for working on solo projects or with a small team.
Now, let's create a project board and get those hands wet! 😄
## Working with the project board on GitHub
First, go to your profile and click on your avatar at the right side of the navbar. Then, select the `Your projects` option.

✍️ **Note**: If you can't find the `Your projects` option, select `Your profile` or `Your repositories` after you click on your avatar. Then, on the top bar, click the `Projects` tab.

### Create a new project board
To create a new project board, click the green button of `New project`.

You will get prompted to select a template with a couple of options; `Start from scratch` and `Project templates`.
To follow this tutorial, you want to go with `Start from scratch`. You can choose `Table` for a spreadsheet view layout or `Board` for a simple task board. What you choose doesn't matter because you can always switch to any format. But for now, go ahead and select the `Board` layout, and click the green `Create` button.

Now you have a project board with `Todo`, `In progress`, and `Done` columns.

### Add a new column
You may want to do some code reviews for your issues (or any other tasks) and need to track it. So let's create a new column for it.
- Click the `+` button at the outer of the columns.

- Click the `+ New Column`.

- Add a title and click enter.

You can change the order of the columns by dragging them if necessary.

### Make the project board public
By default, newly created project boards are private. It would be fine when you're doing a solo project. But when you're working in a team, you want to change the visibility to public.
- In the project board, click the three dots button at the top right side and select `Settings`.

- Go to `Visibility` in the `Danger zone` section. Click the `Private` button, and select `Public` from the dropdown.

✍️ **Note:** In `Settings`, there are also options to close and delete the project. Closing the project will remove the project from the list of open projects. And deleting the project will remove your project once and for all.
### Planning a project
After you have your project board ready, you can start planning the project.
Let's start by changing the project title you can find at the top.
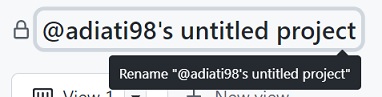
Now you can add the tasks. There are two ways of doing this. And I will walk you through them both.
1. Use an existing issue in a repository
Say you have a repository with an existing issue you want to add to the project board. Let's add this issue to the `Todo` column.
- Click the `+ Add item` button at the bottom of the `Todo` column.
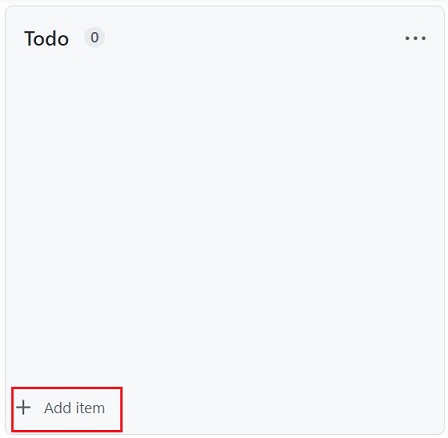
- Type # and select the repository.
You will see a list of repositories that have your issues. Select the target repository, then the issue.

And you have your first todo item based on your issue!

2. Write a new draft issue
You can write a new draft issue if you don't have an issue to be added to the project board.
Click the `+ Add item` button at the bottom of the `Todo`, `In progress`, or any other column, depending on where you want this draft to be.

Then add a title for the draft issue and press enter.


Now let's add a description to the draft, just like you're adding a description for an issue.
- Click the title of the draft.

- Add a description, edit the title, add assignees, and change the status.
You can add a description and edit the title by clicking the `Edit` button. You can also add the assignees and change the status of the progress.

- Convert the draft into an issue.
After you add a description to your draft, you can also opt-in to convert the draft into an issue.
But if you need more time to add a description, hover over the draft issue card. Then click the three dots icon beside the draft text, and click `Convert to issue`.

Now search the repository where you want this issue to be and click it.

And *voila*! Now you have a new issue in your project's repository.

✍️ **Note:** When you click on the three dots, there are also options to archive and delete an issue or a draft issue. Deleting the issue on the project board will only remove it from the project board, not the repository.
### Updating the progress status and tracking the project
By default, there are three progress status columns when you first create the project board. They are the `Todo`, `In progress`, and `Done` columns.
You can drag an issue or a draft issue card from one column to another whenever you want to change their progress status.

If you already made a pull request and linked the issue in your pull request, you can see the link to the pull request in the issue card on the project board. Click the issue's title. And on the right bar, click `Show all fields`.


And when your issue is closed, the issue card will automatically move from wherever column it was to the `Done` column.

#### Check and change the issue's progress status on the project board from the issue page
Say that you want to track or update the progress status of an issue on the project board. And you need to know which project your issue belongs to because you have many projects.
On the issue page, on the right side, look for `Projects`. The project's name and the task's progress status are in this section.
Suppose you want to change the progress status. For example, from `Todo` to `In progress`. Click the `Status` dropdown menu and select `In progress`. The issue card on the project board will then move to the column you've chosen.
Click the project name if you want to open the project board.

## Final words
The projects board is a great tool for solo or team projects to organize your tasks. And now, you can start to plan and track the progress of your project with the projects board on GitHub! 🙌
---
Thank you for reading!
Last, you can find me on [Twitter](https://twitter.com/@AdiatiAyu) and [Mastodon](https://techhub.social/web/@adiatiayu). Let's connect! 😊
📸 Cover image by Glenn Carstens-Peters on Unsplash