Mini Portfolio: Bring Your GitHub Profile To The Next Level

Ayu is a tech blogger, open source contributor & maintainer, and tech community enthusiast based in the Netherlands. She loves photography and iced coffee!
Hello Fellow Codenewbies 👋,
A friend asked me how I created my GitHub profile a while ago and if I ever wrote a blog post about it.
I haven't written one even though I wanted to, because many people already wrote about it.
But after that conversation, I took a look at my GitHub profile. The last time I updated it was more than a year ago. It was still okay. However, I had some ideas to improve it. And now, not only have I updated it, but it also became my mini portfolio. So, I want to share this process with you.
Ayu Adiati's GitHub profile
💡 Improvement Ideas
Create a banner and a footer
I didn't have a banner and a footer. So I wanted to have a banner to give a quick summary of who I am and what I do and a footer to thank everyone who visited my GitHub profile.
I created them with Canva.
Banner

Footer

Sticking to my brand

If you have been following me for a while, you might notice the logo I attached to every blog post's cover picture. The colors that I use for my logo are orange, blue, and white.
So I'm using these colors as a theme for the banner, footer, and background colors.
I want to be consistent and stick to my personal brand across the online platforms.
Change icons to badges
Previously, I used icons from Devicon to display languages and frameworks in the "Skills" section. Even though I set the width and the height of all icons to be the same, they still had different sizes. Adjusting the width and the height individually also didn't do any trick.
Because I want to stick with my brand and don't want to have different sizes of icons, I decided to use badges. With badges, I don't need to adjust width and height, and I can define the background color to follow my brand colors.
Add more sections
Before I updated my GitHub profile, I only had "About Me," "Skills," "Latest Blog Posts," and "Fun Fact About Me" sections.
Then I added the "Accomplishments" section to list all of my accomplishments in tech. I also added a "Community Activities" section to list all my activities in my communities and my volunteer experiences.
Fix the structure
It's not that I didn't have structure for my previous GitHub profile. But after I took a closer look at it, I knew I could improve the structure to be more readable.
So, the new structure would be:
- The banner
- About me
- Skills
- Contribution stats on GitHub
- Accomplishments
- Community activities
- Latest blog posts
- Fun fact about me
- A favorite quote and GIF (just for fun 😄)
- The footer
I also wanted a custom horizontal line to separate each section instead of using the HTML's default one. Like the banner and the footer, I made this custom horizontal line with Canva.
Horizontal line

🖋 Customize The GitHub Profile
This section will walk you through how I created and updated my GitHub profile.
Maybe you don't have a GitHub profile and want to create one.
So, I will start this section with how to create the GitHub profile 😊.
Create a new GitHub profile
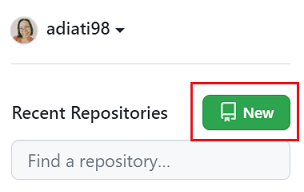
First, you must create a new repository with the same name as your GitHub username.
From your GitHub dashboard, click the green "New" on the left bar.
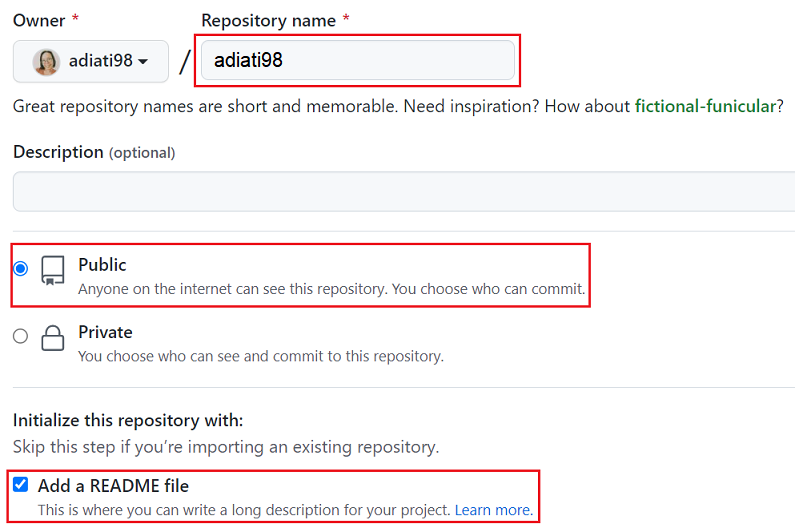
Enter your GitHub username as the repository name. You also have to make the repository public and initialize a README file.
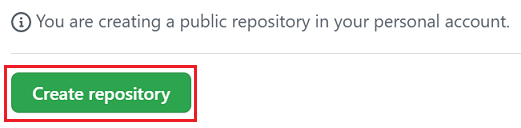
Click the green "Create repository" button at the bottom.
Now you can start customizing your GitHub profile 😄!
Add a banner, footer, and horizontal line
As I mentioned before, I wanted to stick with my brand. The first thing that popped into my mind, although I will create these elements with Canva, they should follow the accessibility rules.
Unfortunately, the color combinations I use for my logo are not accessible if I want to use them as background and small text.
So I tried to find the gradient combination from those colors and check if they meet the WCAG 2.0 guidelines for contrast accessibility by using Accessible Web free tool.
So they are not precisely the same as my brand colors, but they are still within the gradient. And most importantly, they meet the WCAG 2.0 guidelines.
About Me section
I keep this section short and simple. I also included the badges of platforms where people can find me. I created these badges with shields.io.
If you want to use the awesome wave hand GIF by Martin Heinz like I do, you can grab the code below.
<img src="https://raw.githubusercontent.com/MartinHeinz/MartinHeinz/master/wave.gif" width="35px">
Skills section
This section lists the languages, frameworks, and libraries I work with. I also made sub-sections where I listed the frameworks and libraries I worked with and want to learn in the future.
I'm using badges to show the frameworks and libraries.
Create badges with shields.io
<img src="https://img.shields.io/badge/-NodeJS-F3F7FA?logo=node.js&logoColor=339933&style=for-the-badge&logoWidth=30" alt="NodeJS">
I will break down and walk you through the above syntax so you can create your badge.
- Text
Afterhttps://img.shields.io/badge/, add a dash followed by a text of what you want to be written on the badge. - Background color
After setting the text, add a dash followed by the Hex color for the badge's background. You don't need the # symbol for this. Logo
Now you can insert the logo of the language, framework, library, platform, etc., by adding?logo=followed by the logo name, with all letters in lowercase. You can search for the available logos on Simple Icons.
This logo name is case-sensitive. So you want to ensure that all letters are in lowercase and use the format as stated on Simple Icons so that your logo will appear on the badge.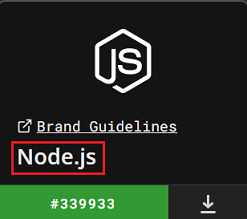
Logo color
You can add the color for your logo by adding&logoColor=followed by the Hex color. If you want to use the logo's official color, you can also find it on Simple Icon.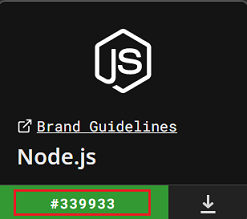
- Style of the badge
I want a simple square style for my badges. So I added&style=for-the-badgeafter the logo color. You can see how to add other styles for the badges on the shields.io website under the "Styles" section. - Set horizontal space
You can set the width of the logo to give some horizontal padding by adding&logoWidth=. Adjust the width based on your need.
Add contribution stats
I want to keep track of my GitHub activities. So I added a GitHub stats and a GitHub streak stats. I customized the color using the same colors as my banner and footer for these cards.
I used to have a top languages card, but I took it down for now because I only want to focus on my GitHub activities.
You can find the instructions to add these cards on the repositories' README file (click the links above). They are pretty straightforward.
Latest blog posts section
I'm regularly writing blog posts. So I added this section to show my latest five blog posts using GitHub Actions workflow by Gautam Krishna.
In the README file, within the section where you want this list to live, add:
  <!-- BLOG-POST-LIST:START -->
  <!-- BLOG-POST-LIST:END -->
Create a folder named
.github. Then create a sub-folder calledworkflow.Inside the
workflowfolder, create a file namedblog-post-workflow.ymland copy/paste this code into the file:name: Latest posts workflow on: schedule: - cron: '0 * * * *' workflow_dispatch: jobs: update-readme-with-blog: name: Update this repo's README with latest blog posts runs-on: ubuntu-latest steps: - uses: actions/checkout@v2 - uses: gautamkrishnar/blog-post-workflow@master with: # Replace this URL with your RSS feed URL/s feed_list: "https://adiati.com/rss.xml" # Optional max_post_count: 5 template: "- `$date` | [$title]($url) $newline" date_format: yyyy-mm-dd tag_post_pre_newline: trueReplace the URL in the
feed_listwith your RSS feed URL.
If you don't have your own domain and you're writing on Hashnode, this should behttps://username.hashnode.dev/rss.xml. Orhttps://dev.to/feed/usernameif you want to show your blog posts on DEV. Replace theusernamewith your username.You can also customize how many posts you want to show, the date format, etc. Look at the available options at Gautam's repository.
- Commit your changes and wait for it to run automatically.
- You can trigger it manually to see the result immediately.
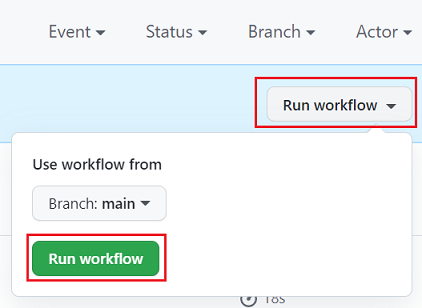
- In your repository, click on the "Actions" tab.

- Click the "Latest posts workflow" on the left bar.

- Click the "Run workflow" dropdown on the right side, then click the green button of "Run workflow".
- Refresh the page. By now, you should see something on the table.

- Now, if you go to your GitHub profile, you can see the blog posts list. If not, try to refresh the page.
- In your repository, click on the "Actions" tab.
If you're creating video content on YouTube, you can also show them on your GitHub profile using this workflow. You can read more about it on Gautam's repository.
Accomplishment, community activities, and fun facts about me sections
There is nothing special in these sections. Because I want to treat my GitHub profile as a mini portfolio and an informal resume, I added the Accomplishments and the Community Activities sections to accomplish these goals.
I added the Fun Facts About Me and my favorite quote and GIF because I am a person outside my profession. And I want to add that touch to my profile.
Final Words
Maybe you have a portfolio or don't want to customize your GitHub profile. That's okay. But if you don't have a portfolio or want to show your work and who you are, you can bring your GitHub profile to the next level and show it to the world 😃.
If you have one, share your GitHub profile here in the comment! 😄
Thank you for reading!
Last, you can find me on Twitter. Let's connect! 😊